Showing posts with label Fishing Lures. Show all posts

Tuesday, February 8, 2011

How to Store and Protect Your Fishing Lures

The biggest threat to the usefulness of a wooden lure is water intrusion. Most lures greatly diminish in value after they have taken in water. While this situation may not be in our control, there are measures that can be taken to reduce its effects. A good example is by drying it out in the sun after it has been in water and storing it in a dry place.
Even normal casting and retrieving can inflict some amount of damage on the lures. Hook scars from swimming along the belly can completely remove clear coats, paint and primer and if left unattended can dig into the lures body it. Another issue to look out for is loosening of the hardware as this might lead to loss of the lure at sea. These sorts of problems are easily correctable by doing quick repairs before the problem gets completely out of hand.
 Another aspect to consider is maintaining the lures as much as possible. For this, at your first purchase it is best to not be cheap and pay a few extra dollars for your product. Generally, more expensive lures can have a prolonged life-span when compared to the ones you paid only a few dollars for.
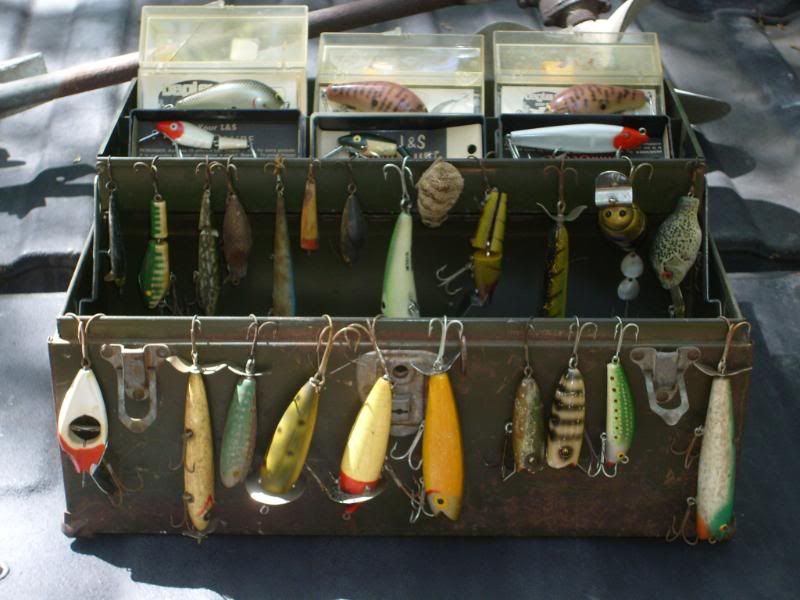
The other important issue when it comes to protecting your fishing lure is the issue of storage. Mostly, fishing lures do not require that much attention when it comes to storing them. A safe, dry place is all that is required but be careful not to mix them up with other valuable things that they might damage using their hooks. Also keep away from children as it may harm them.
Sharing of lures is not uncommon among anglers as they might want to test a particular their neighbor or friend has before buying their own. However, sharing of lures may lead to loss since you may not remember who in particular you gave your lure to. Hence you need to keep tabs on who you hand out your lure to. It is also wise to advice whoever you are handing it out to how they should protect it while it is with them.
If you are taking part in salt water fishing, it is wise to rinse off your lure thoroughly in order to avoid cases of rust and to keep your lures in top shape. You can do this by removing them from the fishing line, rinsing them off and attaching them to your fishing vest to air dry. This way you get to use your lures for longer and save your money in the process.
Nigel J Parker, has a passion for all things fishing. Has written several articles on fishing and this time around he discusses about Trout Lures and Topwater Lures and specific ways to use these to improve your catch.
Article Source: http://EzineArticles.com/?expert=Nigel_John_Parker 

10 Types Of Fishing Lures That Can Help You Catch The Big One
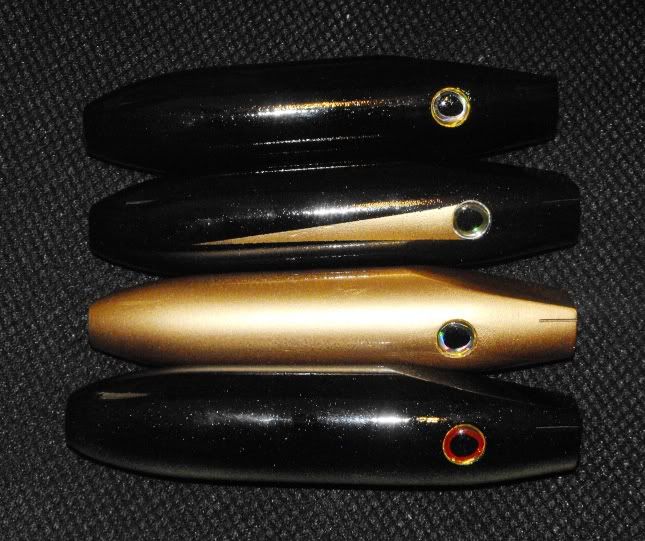
When it comes to fishing lures, you want to be sure you have the right one for the job but with so many to choose from how do you pick the best one? The waters you are fishing, the time of year and the weather all have an impact on what type of lure will look tasty to the species of fish you were trying to catch.
There are a variety of different lures, all in different shapes sizes and colors and most avid anglers have quite a selection in their tackle box. Here are a few types you might want to include in your list of fishing gear.


Surface Lures
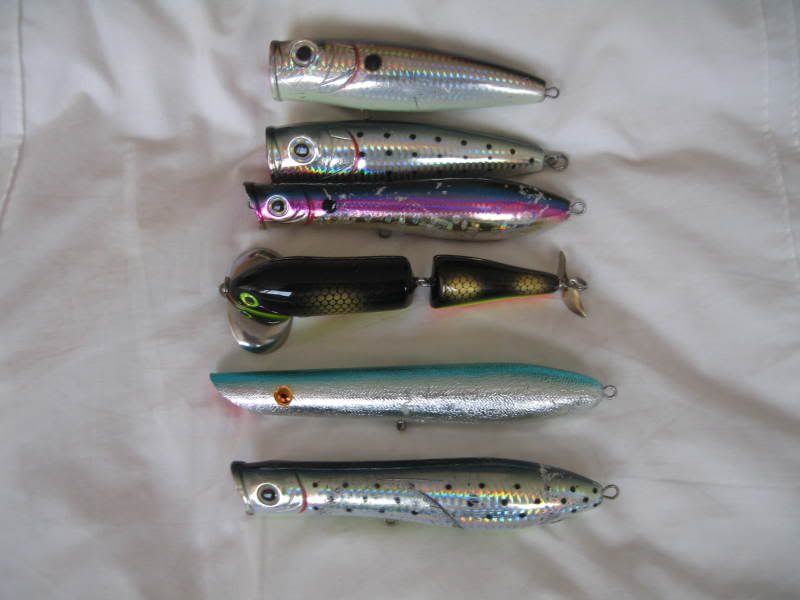
These are lures that you retrieve along the surface of the water and are fun to use since the fish explodes up out of the water in order to take in the lure. They are great if you're fishing in waters that have a lot of weeds since they remain on the top and are less likely to get tangled in the weeds. Surface lures come in all kinds of colors and shapes and it's fun to pick them out in the store and find the ones that work best for you.

Spoons
Spoons are a simple metal lure that looks like a spoon. When you retrieve them they make a wobbling motion which is attractive to fish. They are inexpensive and fairly easy to use so a great choice for beginners.


Spinners
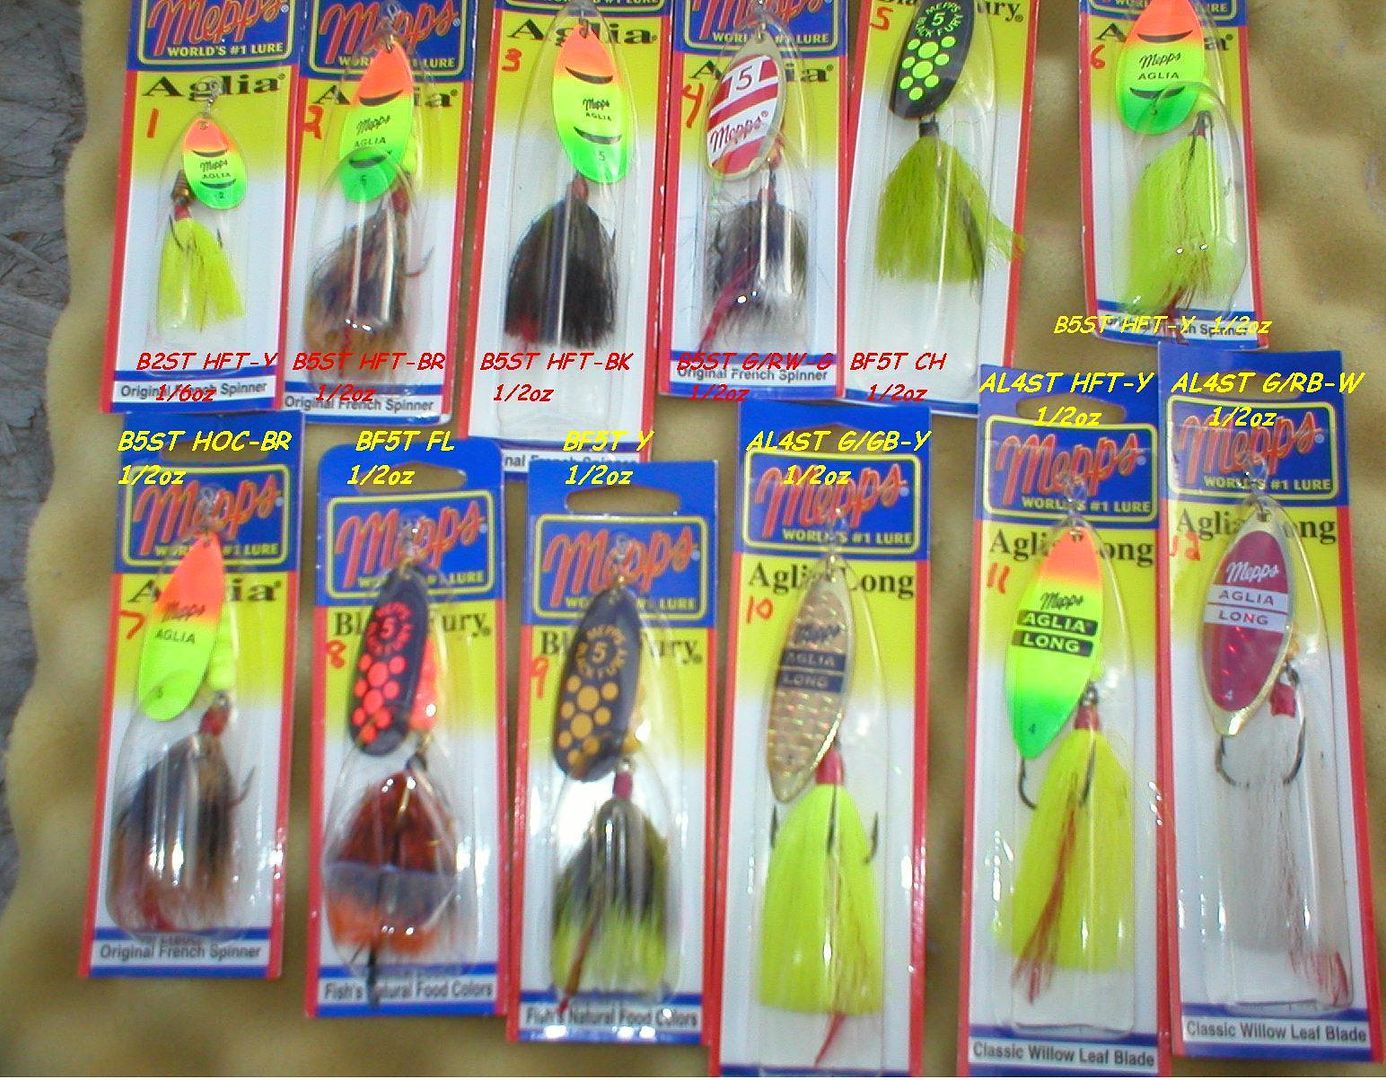
This type of fishing lore has a blade that rotates and the rotating motion gives off a reflection which imitates the light glinting off of fish scales in the water. When you are retrieving a spinner, you can alter the speed that you retrieve thus making it look like an injured fish. If you're fishing for pike a large spinner can be great but if you go in for mullet or trout try a smaller size.


Jerk Baits
Jerk baits don't have any movement on their own but allow the angler to jerk them and bring them to life like a wounded fish or worm. You cast them into the water and then make a jerky motion with your rod which simulates the movements of an injured fish making it look like a tasty morsel to the fish you are trying to attract.


Soft Baits
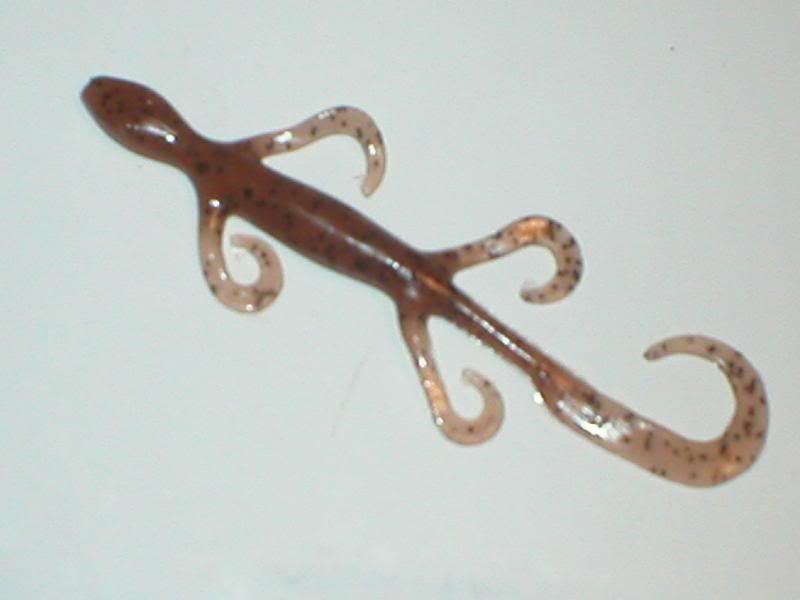
These are soft rubber baits that could look like long worms or frogs or a bunch of other shapes. Typically these are used with a weighted jig head and retreat slowly or in a jerky motion.

Floating Divers
This type of fishing lure sinks into the water after you cast and can cover depths up to 15 feet or more. Each floor is designed for a different depth and this depends on the angle of the lure. A lure with a smaller angle will dive deeper than a lore with a bigger angle. Depending on the depth of the water that your target fish hangs out in will dictate the type of lure you use.

Light Standard Casting Lures
Standard casting lures can be used to catch a large range of fish including certain types of bass if retrieve data slow to medium speed. They range from about 1/16 of announced to 3 ounces and are typically used for freshwater fishing of lightweight species.

Heavy Standard Casting Lures
This heavy fishing lure is best used for the heaviest fish like bass and walleye. Just like any other lure they come in a variety of shapes, sizes and colors.

Long Casting - Jigging Lures
These jigging lures are used for long casting and are used to catch anything from tuna to trout to pike.

Deadly Diamond Lures
This is a small fishing lure that is under 1 ounce and is used to catch the smaller fish. It's cut with a diamond shape on the top and the light reflects from this therefore attracting fish. These lures are typically used for walleye and crappy although can work good for other small species to.
Find out more about finding the right fishing gear by visiting http://www.fishinggeartips.com - a website that offers information on fishing including tips on fishing reels, fishing rods, fishing line, and fishing lures [http://www.fishinggeartips.com/fishinglure.php]
Article Source: http://EzineArticles.com/?expert=Lee_Dobbins 

Monday, January 17, 2011

Fishing Lure Colors

When you go out fishing, you want to catch fish. For one reason or another, you want you day out on the lake to be one of productivity. Now, you may want to have a nice big fish fry when you get back home, or you may just want to catch and release them. Perhaps you want to catch a huge trophy that you can hang up on your wall, now that is the dream of most fishermen. Regardless of what you are going to do with them, you want to catch some fish, but in order to do that, you must make sure that you choose the right color of fishing lure.
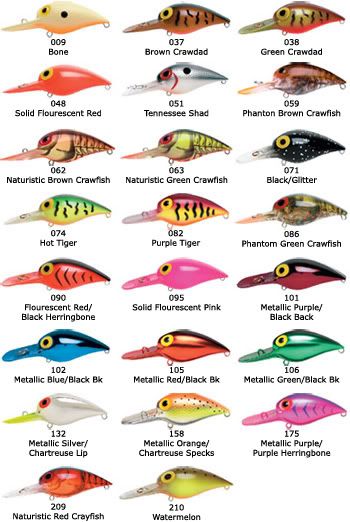
Fishing lures come in a Variety of colors. Some are very deep, while others are very like. There are all the colors of the rainbow to choose from. In addition to solid colors, there are so many combinations of these colors is so many color patterns that you may find it almost impossible to decide on one. There are also patterns that closely mimic the look of a baitfish.


When selecting the appropriately colored fishing lure, the most important thing to do is to not get overwhelmed. You will find that there are really only a few color combinations that you need.
First off, you will want some bright oranges, greens, and yellows to use in muddy water. Next, you will want to use some deeper, darker colors for clear water such as black, brown, and blue. You will want to try out several patterns of these colors to see which ones work the best.
Find fishing organizations fast by going to this site.
Article Source: http://EzineArticles.com/?expert=A_Art

Sunday, October 31, 2010

Soft Plastic Worms - The King of Freshwater Lures


When all else fails you, go to a soft plastic worm!
Out of all the different types of freshwater lures that are on the market, no other type of freshwater bait has caught more fish for freshwater fisherman than the humble soft plastic worm.
So what makes the humble worm the most successful and favourite of freshwater fishing lures?
Well for one thing they are dead easy to fish with, for most people the finesse style of fishing needed when fishing soft plastic worms comes naturally, even if they have never fished freshwater before.
Another great aspect of using worms is their action in the water, whether you rig your worms Texas style or whacky style, the action a worms presents to bass and many other freshwater species is just too attractive to pass up; which is probably why the humble soft plastic worm has become the 'go to freshwater lure' for most seasoned anglers.
So what are some things to look out for when fishing soft plastic worms?
Like most lures experiment, its a good idea to have a number of colours on hand although basic rule of thumb is to use lighter colour plastic worms for clear well lit water and darker worms for low light or stained murky water.
Purchase good quality worms, although plastic worms might seem pretty simple enough, purchasing a good quality well known plastic worm will see you catch more fish. The action of the worm in the water, its impregnated scent and its appearance in the water will all contribute to your fishing success.
Patience is vital, when fishing worms as with fishing many other freshwater lures be sure to give your worm a good workout before switching your type of bait or moving to another area. You never know what may be lurking on the fringes just ready to ambush your soft plastic lure on your next cast.
The weight of the plastic worm will dictate how you fish, if you are fishing in deeper water you will need a heavier worm and may even have to weight your worm with a jig head or use nail weights when wacky rigged, though in my experience adding weight to your soft plastic worm can take away some of the worm's action.
All in all if you want to catch more fish more often, you would do well to have a handful of quality soft plastic worms of different colours and sizes on hand for your next bass fishing trip.
John Salamon is a avid product tester of freshwater lures and experienced freshwater fisherman who enjoys writing about his passion.
For more informative articles on the latest freshwater lures available and some great freshwater fishing techniques visit the Freshwater Lures website.
Article Source: http://EzineArticles.com/?expert=John_Salamon

see my previous post :
Fishing Lures - Small Things Make Big Differences in Angling

Wednesday, October 27, 2010

Fishing Lures - Small Things Make Big Differences in Angling

When you think of fishing, there is perhaps no piece of equipment more recognized than fishing lures. There are countless thousands of lures on the market, and there is something for just about every species of fish to mistake for a good meal. Fishing lures today come in just about every conceivable color and shape, from bright neon minnows, to larger rubber frogs and crawfish. Finding the right lures for the days on the lake sometimes can be tricky, as during different seasons a lake fish such as a bass or trout change their diet to accommodate the various temperatures and water conditions.

While many people enjoy using a good old worm to land a fish on the docks every now and again, it is the lures that tend to offer the best strikes from the larger fish. Species such as bass, pike, and walleye tend to go after larger quick moving bait, when it comes to mealtime. This is not to say that a larger predatory fish will not enjoy a worm every once and a while, it just means that lures are more apt to look like what they are accustomed to hunting in regards to prey.
When it comes to lures there are a great number of benefits when fishing, allowing the angler many options when it comes to choice being the most obvious. There are however some disadvantages as well when it comes to lures. Easily the biggest disadvantage that lures possess, would have to be the snag factor. Sometimes when casting lures in tight areas that may include weeds or water logged driftwood, fishing lures may become snagged and unable to release. There are good possibilities at this point that you can loose that prized lure, as you will be unable to get it free from the object. This could easily become a rather costly day on the lake, should you loose 3-5 lures while trying to get your cast in tight where a school may be in staging.
Sometimes a smart fish may not go after even some of the best fishing lures, as it still may be skeptical of the lures movements and deem it non-edible. Matching the right fishing lures with the right species and season, can make all the difference in the world when it comes to being successful on the lake. Trying to catch a small lake trout with lures that are primarily designed for large mouth bass, will only show you just how smart a fish can really be. For this very reason lures are designed around the breed themselves, and are diligently worked on to improve their success rate when used. Perhaps one of the best ways to ensure some level of success with lures, would be to do some research on the species themselves.
By studying their natural habitat, their feeding preferences, and there behaviors, you will be able to get a better understanding of this particular breeds traits. From this point you will be more suited to make an educated guess on which fishing lures will work best for what you are after.
Check out http://www.1-stop-fishing.com/ for more articles on canada lake trout fishing and ontario fishing vacation.
Article Source: http://EzineArticles.com/?expert=Mike_Singh

see my previous post :
How to Make Your Own Great Wide Mouth Bass Fishing Lures

Sunday, October 17, 2010

How to Make Your Own Great Wide Mouth Bass Fishing Lures

Making your own fishing lures can be a great way of saving yourself a bucket load of money on shop bought lures, it can also be very relaxing and can become a great new hobby for those times when your not out fishing. You don't need a large workshop for doing this just a small work bench or even your kitchen table will do. Lets take a look at some of the tools your going to need not having the right one's your going to struggle to make your lure having the correct tools will make the whole process easy and an enjoyable hobby for you and all your family if you want to get them involved as well.

You will probably find that you already have most of the tools that you will require, and is not going to break the bank buying the rest you need for making your bass fishing lures. First off your going to need a vice for clamping your work you can get small clamp on vice at most hardware stores that you can just clamp onto your work station. If your going to be making metal lures you will also need an anvil for working the metal fishing lure if you invest in a larger make of vice some will come with a built in anvil on the back of the vice.

You should start off by making a simple fishing lure first till you gain confidence and get used to using your tools, a simple one to start with is the wobbler this is an old time favourite with fishermen. It is a simple shape and does not require a lot of carving skills perfect for the beginner, it is generally 4 inches long and 3/4 of an inch diameter these are normally classed as bait casting size perfect for spin casting and spinning.

Once you have cut your timber to length you will need to carve to a round shape along its length and round one end, then on the other end cut a 45% angle you will then need a gauge chisel to form a groove on the end you have just cut to 45%. to finish the fishing lure you will need 3 treble hooks and 4 screw eyes, you should make pilot holes before attaching the hooks and screw eyes you do this using a brad awl, attach the treble hooks to 3 of the eyes then attach one to the rounded end of the fishing lure then attach the other 2 at about a third of the way in from either end. The attach just the eye to the 45% end you cut earlier now all that is left is to paint your fishing lure to your requirements.

Now that we have got your creative side going you will want more ideas and tips for saving you more money and tips for your new found hobby, you can find all these and more at Make Your Own Fishing Lures Then if your looking for ways to increase your catch take a look at these ideas Bass Fishing Exposed Enjoy your new found hobby and better catches.

Article Source: http://EzineArticles.com/?expert=Dave_Townley 


see my previous post :
Making Deep Diving Fishing Lures

Wednesday, October 13, 2010

Making Deep Diving Fishing Lures

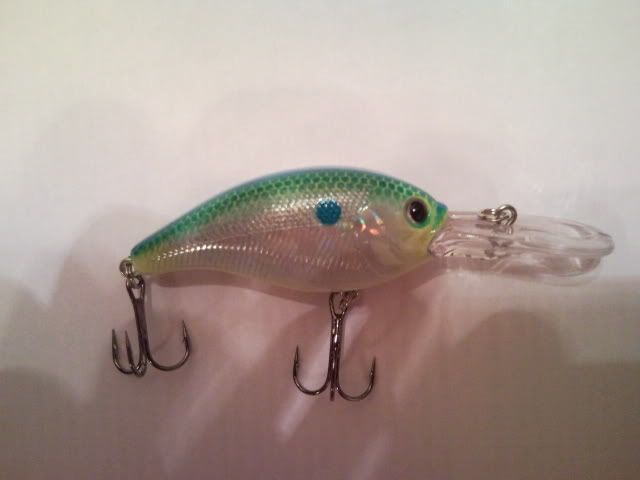
"The foundation of effective crankbait fishing is very simple; know the depth your crankbaits run. Until this knowledge is in hand, all the other crankbait questions are very insignificant. After all, if you can't get the bait to the fish, how could color, shape, action, or models of crankbaits make any difference whatsoever".

These are the words of bass pro and fishing legend Mike McClelland in his book "Walleye Troubleshooting", and when I read the above passage a few days ago I was reminded of an experience I once had that illustrated this point perfectly.


It had been a slow start to the day. I'd started in the predawn light dawn by tossing topwater lures over the recently inundated grass in some small embayments without any real luck. A couple of half hearted smacks by some very small fish. As the sun had risen I had shifted my attention to a steeper section of bank, gently bumping small, lightly weighted soft plastics down the contours for one small bass and not much else.

By now it was mid morning, the sun was well overhead and I was having a coffee from the thermos while deciding on the next strategy. One thing I knew for sure - in this small clear water lake, at this time of day the Bass would be down deep. Until the sun was again low in the sky the two most likely places to find bass would be in the open water suspending above a thermocline, or along the steeper banks skulking around weed beds, under lillies or whatever timber they could use for cover.


 The problem of fishing from a kayak was that I didn't have the benefit of a fish finder, so I had no idea of the depth of the thermocline or whether the fish were hanging there. There was a lot of open water out there, and I wasn't confident of locating the fish without my precious electronics, so I opted to fish along the steeply shelving banks. After an hour or so of casting spinnerbaits, crankbaits and soft plastics without joy, I eventually decided to cover more water and resorted to trolling a small deep diving crankbait behind the kayak.

I'd only been going about 15 minutes when I rounded a bend to find I had company - a couple of blokes in a small electric powered boat, trolling along. We exchanged pleasantries, and I was informed that these chaps had been fortunate enough to have some success on the bass that day. They had found that fish were suspending at around 15ft depth in small embayments that were steep sided and up to 40 ft deep. For me, that cut a lot of the guesswork out. It was a simple matter to find small, deep embayments, and with careful selection of a small deep diving crankbait I was saved from a fishless day by a couple of great bass.


Now, I probably could have caught fish by counting down a spinner bait, lightly weighted plastic or even a sinking crankbait, jerkbait or similar. But for me a floating/diving crankbait was the perfect choice. Why? Because it gave me much better control of the depth of the lure, so I knew it was always in the strike zone. And it allowed me to cover more water to find the fish, knowing all the while I was fishing at the right depth - all I had to do was paddle in a zig zag fashion across the bay while trolling the lure at a working speed.

Let's get down to it, hey?

In this article I'll talk a bit about what I refer to as floater divers. That is, lures that float when they land on the water but dive under the surface with a swimming motion when you retrieve or troll them. We'll have a look at some design aspects that make these lures dive deeper. I'm not going to touch on sinking hard baits at this stage - I'll get to them in another article. On thing though: Be sure to read to the end of this article for one final gem of info from Mike McClelland.

Before we go any further though, here are a few other relevant facts that I've pulled our of Mike McClellands book. Mike undertook extensive testing of 200 of the best bass lures on five different line sizes with line lengths increasing in 10 foot intervals, and made some rather useful observations:

* The typical distance that most lures could be cast was 65 - 80 ft (20-25m), more with thinner lines, less with thicker. For every 10 feet of additional line out the depth increased by 10 percent, and vice versa for shorter lines.
* Provided the lure was worked at sufficient speed to impart a working action, the speed at which a lure was retrieved or trolled had minimal effect on the diving depth.
* The same lure can run at much deeper depths when trolled than when cast, as the length of line out can be much greater. With 100-130 feet of line out (30-40m), the dive depth of many lures was double that of a cast lure.
* About 25% of the line has been retrieved by the time that a cast lure reaches it's maximum depth. This is less of a problem when tossing hard baits from a boat toward the shore, as the depth of water is generally shallower at the end of the cast and deeper at the end of the retrieve. It has obvious implications for the shore based angler though.

Designing and fishing home made wooden lures for depth

I'll focus here on a few of the more important points for getting lures down deep, but there are plenty of other design aspects that can also help.

Bib area

Without a doubt, the single most important factor that decides how deep a wooden crankbait will dive is the combination of the surface area of the bib or lip and the location of the towpoint to which the line is tied. The bigger the surface area in front of the towpoint, the deeper the lure will dive, as a general rule. Here's the thing though. Put too much bib in front of the towpoint and the lure becomes unstable, must be worked very slowly and is prone to 'blowing out' during the retrieve. Too little surface area forward of the towpoint and the action is reduced or the lure may swim unnaturally.

Bib angle

It is urban myth that the angle at which the bib is set (ie how close it is to horizontal) is the main influence that affects diving depth. I know a lot of people will argue me on this, and it seems to fly in the face of your observations. Take a look at almost all deep diving lures made commercially and the bib is almost horizontal. Isn't that evidence enough?

Let me explain. What the bib angle does significantly affect is the width of the action and how fast the lure reaches maximum diving depth. A bib that is set close to right angles to the horizontal line will have a very strong action, wobbling widely from side to side. This lure will need to be fished relatively slowly to avoid "blowing out" (laying over on it's side) when the wobbling get out of control. The same lure with the same size and shape bib set nearly horizontal will have a much tighter action and will be much less prone to blowout.

Now consider this: increasing the surface area of the bib also increases the strength of the action because there is greater area forward of the towpoint for the water pressure to act on. Fitting a lure with a large bib set perpendicular results in a lure that can't be worked without blowing out. At the end of the day, if we as luremakers want to use a bib large enough to give us the dive depths we are looking for, we have no option but to set the bib close to horizontal. Full stop.

Lure balance

There are limits to how large a bib can be made before the lure becomes unbalanced. With very large bibs the drag becomes unmanageable and I've seen and used lures for Murray cod fishing that put up a better fish than the fish do!

Because you will be using a large bib to maximise depth, the action of the lure will be quite strong, so the problem of the lure becoming unstable and blowing out is more challenging. Most deep diving lures are fairly wide in the body, giving them extra buoyancy. Internally weighting them about 1/3 of the way back and keeping the weight close to the belly can make it more difficult for the lure to roll on it's side. This style of lure can cope with a bigger bib - but of course drag becomes more of a problem and trolling or retrieve speeds must be slower.

Bib shape

Bib shape is another important feature. A wide bib creates a wider, stronger wobbling action, which, whilst it might be desirable in many situations, can create such a strong action that the lure becomes unstable. a bib that is wider at the end and narrows close to where it joins the lure creates a more stable lure, allowing a bigger bib to be used. A bib that has a scooped shape (ie it curves up at the end) can help give lures a little extra diving depth as well.

So that's it, those are the basics of designing a deep diving hard bodied lure.

So now, what was that final pearl of wisdom from Mike McClelland?

"Trolling below suspended fish doesn't produce".

During his lure trials Mike caught 40 bass, and not one single fish had come from above the lure, every one of them had been beneath the lure when it was trolled past. Some had travelled up to 30 ft (10m) to take the lure, while other fish were much closer to the lure but didn't strike it because it passed beneath them.

This mirrors my own experience in almost every circumstance. We need deep diving lures to get down close to suspending fish, or those hugging the bottom or structure, but be careful not to go too deep - allowing the lure to pass beneath the fish will hurt your catch rates.

Dr Greg Vinall has been hand crafting custom fishing lures for decades from both wood and plastic. Why? Because he's proven time and time again that custom fishing lures allow you to catch more fish, bigger fish and have a HUGE edge over competitors and fishing buddies who use off the shelf commercial lures.
Greg now shares the substantial lure making skills and knowledge that he has amassed over this time through his web site and articles.

If you found the content of this article informative and would like to receive similar wooden lure making information via email, you can subscribe to Greg's weekly wooden lure making tips by completing the online form at
http://www.makebetterfishinglures.com/woodenlures.html

Article Source: http://EzineArticles.com/?expert=Greg_Vinall
TNFC92UVQYCW


see my previous post :
Sea Fishing Tackle Basics For Anglers

Friday, October 8, 2010

Choosing The Right Timber For Wooden Lure Making

Are All Lure Making Timbers Born Equal?
I know this seems like a dumb question, but it's amazing how few people give any real thought to what type of timber they should use for their lure making! But the type of wood you select be the difference between an ok lure and one that's an absolute winner!

In fact, if you're really serious about your luremaking you certainly wouldn't limit yourself to a single timber - I use several different ones, depending on the intended use of my lure.


Thinking back a decade or two (shite, am I really that old?), some of my early luremaking endeavours were definitely below par, simply because my choice of timber wasn't great.

Back then, I was a kid and was just starting to learn about making and using lures - these days it's an obsession. I was making lures out of necessity because I was a schoolboy lure fishing addict who didn't have the financial means to support his expensive fishing habit. I'd go into the fishing shop and pick up lures, get a real good look at them, feel the weight, carefully note all the contours, then go home and try to imitate them! I occasionally still do this today!

I was making lures purely because I otherwise couldn't afford them, and my source of lure making timber was any construction site I went past as I cycled home from school. I'd fill my school bag with whatever offcuts I could get my hands on, then head home to the old man's shed. Night after night.

In those days I didn't understand the awesome power of custom lures (that took a few years), and I saw my lures as inferior imitations of the 'real' thing. I didn't expect to catch fish, but I had early success on a couple of suicidal rainbow trout and my enthusiasm got the better of me... so here I am year later and still making wooden lures!

Desirable and undesirable qualities of wood for lure making

It's fair to say that most timbers have their place in lure making. It's just that some timbers are better for some styles of lure, and others are better for a different style. There are probably a few that don't have a real place in luremaking, I guess.

To go back to my schoolboy days once again, I remember spending ages hand carving half a dozen lures out of redgum, one of our harder, denser Australian timbers. Redgum is beautiful timber and over the years I've enjoyed making some really nice furniture that took full advantage of the rich color and beautiful grain. As a luremaking timber though, it sucks!

Redgum is incredibly hard and has interlocking grain. It's also very dense. All of this made it very difficult to shape, so it literally took a couple of hours to make each lure. And when I'd finished the lures looked beautiful, but didn't work because they were designed to be floater divers, and unfortunately redgum is so dense it sinks!

Incidentally, here's a random tip, the best timbers for making sinking wooden lures are those that are fairly buoyant (ie they float high in the water) - more on this in a later newsletter!

Ok, so what are the key qualities of a really good wooden lure making timber?

* It must be easy to work. Once I've cut the basic shape of a lure out it takes me 5-10 minutes to hard carve and sand the body, ready for hardware and paint. Less if I'm using power tools to speed the process up. If your lure making timber is difficult to carve (ie it's hard or has difficult grain), find a better option!
* Wood for lure making should be light in weight. Dense, heavy timbers are generally hard to work with, but more importantly they give the lure an inferior action. The lighter the timber, the better the action.
* Wooden lure making is full of compromises! As well as being light, your lure making timber needs to be strong. Of course, the lighter the timber the less strong it is......so there lies our dilemma. I use balsa a lot for making lures because it is so light. However, I try to restrict its use to lighter fishing applications, like trout, bass, bream etc, because most of our larger, feistier fish will destroy a balsa lure. Generally speaking, balsa is fine for freshwater and lighter saltwater applications, but a harder timber is required for medium to heavy saltwater.
* Timber grain is really important in wooden lure making, for a couple of reasons. Timber with interlocking grain can be very difficult to work with. some softwoods (eg radiata pine) have layers of light and dark grain, which alternate from soft to hard. It's sometimes hard to shape these without getting little ridges where the hard grain is. Open grained timbers can be used and often work quite well - meranti was one I used to use a lot - but if you want a really professional looking lure, be prepared to spend extra time filling the grain to get a smooth surface for painting.
* Good wooden lure timbers must take a finish well. What do I mean by this? We'll, to give an example, here in Australia we have a very beautiful timber called Huon pine. Before it was poisonously expensive it was a favorite with boat builders because it is almost completely waterproof, light, strong and very easy to work. The problem for wooden lure makers? Huon pine is oily, so when I've experimented with it I've had difficulty getting paint to adhere properly. Often they look perfect straight after painting, but the paint job doesn't seem to last when you start using them. Go for wood that paint will stick to.
* Wood for lure making must be cheap and readily available. As custom lure makers we don't mind paying for quality materials if that's what it takes to make great wooden lures. But there are so many cheap timbers out there that are perfect for the task, why would you use expensive ones? Try to choose timbers that you will be able to get more of in years to come. Making the same lure out of different timber will give a very different action. You don't want to be in the position of developing a gun, fish catching lure, only to find you can't make more because you can't get that timber any more.
* I'm a great fan of through-wire construction for lure making, because I like to know that if something really big or toothy nails my lure I'll still land the fish, even if the lure is destroyed. Plenty of people prefer screw eyes or glued in wire eyelets, which is fine (I sometimes use the latter for light duty lures, but I don't often use screw eyes because I prefer not to mail order components - I get my materials locally). If you don't use a through wire construction, be sure that the wood you choose will hold a screw securely, or will make a strong bond with epoxy (or your preferred glue). Otherwise you'll be losing fish!
* I prefer my lure making wood to be square at the start. I know that plenty of lure makers use old broom handles and other non-square sources, but I've found that to consistently get the best action you really need to start with square timber. I prefer to buy wood in planks then cut it to size, but if you don't have the tools, get the lumber yard to do this for you.
* Avoid knotty timber. Knots make the wood hard to work, can cause your finished lures to be unbalanced and are generally a hassle you don't need. When you are selecting or ordering timber, try to go for straight, even grained planks.
* Always choose well seasoned timbers. Cabinet makers often preferred air dried timber, but for lure making it doesn't really matter whether it is air or kiln dried, just that it is completely dry. Lures made from poorly seasoned timber have an inferior action due to additional weight, and often crack, split or distort as the timber dries. You may also find that your paint job won't last as long as it should.

Some basic lure making timbers

The list of timbers that can be used for wooden lure making is endless, but here is just a few to get you started

Balsa

This is one of the all time classic lure making timbers. You can get balsa readily through hobby shops and most larger hardware stores. It's light, easy to work, takes paint and makes some of the sweetest actioned fishing lures around. I use balsa a lot for freshwater and light saltwater lures. I don't trust it's ability to hold screw eye though, so I'd recommend going for a through-wire construction.

Cedar

There are various cedars around. I mostly use western red cedar because it's easy to get, but my North American friends use eastern red cedar. I've used both, and from a lure making perspective they're pretty much the same timber. Light, good strength, good screw, paint and glue holding ability. Cedar is really easy to work, too. My favorite.

Pine

There are various pine species that can be used for making wooden lures. I use radiata because it's the most readily available in my area and is relatively cheap. The grain of radiata pine can sometimes be a nuisance, but it holds glue and screws and is pretty easy to work with. It's a bit tougher than balsa and cedar, so I often use it for heavier duty lures.

Meranti

Meranti used to be used a lot for architraves and skirtings in homes, so a lot of my early lure making used offcuts of this timber. These days meranti is a lot harder to get and much more expensive. It's an easy to work, straight grained timber that takes screws, glue and paint well. Unfortunately, it has an open grain that needs a little extra work if you want a high quality finish on your lure. I think cedar is a superior lure making wood.

Others

I've also made or seen lures made out of basswood, cherry, fir, beech and various novelty hardwoods. They all have their place and they all have their advantages and disadvantages. At the end of the day use the above as a guide, then go find out what lure making timbers are available to you in your area and give them a go.

If I had to choose just one wooden lure making timber, for me it would be cedar. I think it's almost the perfect lure making material.

Want more information?

If you're ready to start making some really high quality wooden fishing lures, why not check out my ebook "Make Better Fishing Lures: Wooden Lures" at http://www.makebetterfishinglures.com/woodenlures.html?

And before you ask, I'm not talking just topwater lures, I'm talking crankbaits, jerkbaits and any other hard bait you can thing of. My book will give you all the information you need to make custom wooden fishing lures that not only look professional, they will outperform bought lures. I give you step by step instructions, with photographs each and every step of the way.

**IMPORTANT** - You don't need to own lathes, drill presses, power saws, band saws, dremel tools, airbrushes or any other expensive tools or machinery to make lures my way! Just a few simple hand tools a bit of wood and a couple of spray cans and you'll be making killer custom fishing lures. If you have any of the above power tools, great! You can use them to make lures faster if you like, but you don't NEED them.

Greg Vinall

Aquatic Scientist, Lure Maker and Lunatic Fisherman
http://www.makebetterfishinglures.com

Article Source: http://EzineArticles.com/?expert=Greg_Vinall


see my previous post :
How Do You Make A Fishing Lure Look Alive

Wednesday, October 6, 2010

How Do You Make A Fishing Lure Look Alive

The entire point of a fishing lure is for said lure to look like some sort of bait that fish eat. In many cases fishing lures are designed to look like a wounded or injured fish so that predator fish are more likely to think they're getting an easy meal. This is all well and good and companies such as Rapala and Yo-Zuri have been making high quality fishing lures that work well for years. And these types of lures catch fish, there's no doubt about that, but at the end of the day how do you make a fishing lure look alive? Is it even possible to make a fishing lure look alive?


Many anglers twitch their rod tips while reeling in their lures and/or vary the speeds at which they retrieve their lures for a more realistic appearance. This seems to help a fishing lure look alive, heck I've been using these tactics for years. These types of tactics do work, there's no doubt about it, but there is also another option. That option is to get your hands on a fishing lure that looks alive because it was designing that way.

If you want to know how to make a fishing lure look alive, the easiest way is to get one that looks that way all the time. The fishing lure that I'm referring to is called the KickTail Minnow. This fishing lure was designed to look alive, and I have to admit, that's what it looks like. The KickTail minnow looks as much like a live minnow as any fishing lure that I've ever seen. I honesty mean no disrespect to Rapala or Yo-zuri lures, because they resemble live minnows very well. However, the KickTail minnow simply does a better job in my opinion.

The bottom line is that the answer to the question of how do you make a fishing lure look alive, is to use a fishing lure like the KickTail minnow. This way you don't have to do anything differently, all you have to do is reel it in. Marine biologists will tell you that fish attack live things, so the more alive your lure appears, the more likely a fish will be to bite it. That's precisely what I'm referring to, and the KickTail Minnow offers exactly that.

If you want to make a fishing lure look alive, the easiest way to accomplish this is to get a hold of a fishing lure that is designed to look alive. Otherwise we can all stick to "twitching" our rod tips and varying the speed of our retrieve, which as we all know is effective as well. The bottom line is that we all want our fishing lures to look as "alive" as is possible, right? There are different ways of accomplishing this task, which this article discussed, but I still think the most simple and easy way is to simply get your hands on a lure that does it better that the others.

Trevor Kugler is co-founder of JRWfishing.com and an avid angler. He has more than 20 years experience fishing for all types of fish, and 15 years of business and internet experience. He currently raises his three year old daughter in the heart of trout fishing country…..Montana!

Fishing Lures That Look ALIVE: http://www.jrwfishing.com/ktm.html

Article Source: http://EzineArticles.com/?expert=Trevor_Kugler 


see my previous post :
Homemade Lures - How to Make Them

Tuesday, October 5, 2010

Homemade Lures - How to Make Them

There are many people that purchase their own lures for fishing, but more and more people today are beginning to turn to homemade lures. They enjoy making the lures themselves. When you make your lures on your own, it lets you to make something that is very unique. You can also target the lures that you make for special conditions or for a particular fish that you want to catch as well. If you want to make your own homemade lures, then here is a look at how you can easily make them yourself.


Supplies You'll Need to Have
Of course, you first are going to need to get all the tools and materials together that you are going to need to make these homemade lures. There are quite a few things that you should ensure that you have. The tools that are going to need include things like vinyl paint, thread, sand paper, pocket knives, coping saw, crimping tools, hair stackers, wire formers, scissors, pliers, bobbin, and more.

Not only will you need to have the right tools, but you also need to make sure that you have the right materials as well. Go out and purchase some features, beads, hooks, snap swivels, spinner blades, calf tails, wire, wood blocks, spinner bodies, floss, split rings barrel swivels, and connector sleeves. These are all important supplies that you are going to need for your homemade lures.

Decide on the Lure to Make
The next thing you need to do is decide on the lure that you want to make. This is going to depend on several things. Think about the type of fish you want to lure in, the depth at which you will be using the lure at, the action needed, and more. Also think about the weather, the clarity of the water, and the colors of the fish prey that these fish go after. This can help you to come up with the right lure that you need to make.

Come Up with a Sketch
Then it is a good idea to come up with a sketch of your lure. When you make homemade lures, it is very helpful to have a sketch of the design you want to make. Think about the types of lures you have made before or lures that you have used that have been very effective for you. Then draw it out on paper so you have something to go by when you are actually making the lure.

Build and Then Test
Now you are ready to build the lure. Make the lure according to the sketch that you have already made. Of course once you actually make the lure, then comes the fun. Now you get to take out your homemade lure and test it. Make sure you do the test under the right conditions so you get a good idea of how it works. If it is effective, you may want to make a few more like it that you can use as well.

Experience Ultimate Satisfaction When You Haul In A Fish Caught On A Homemade Lure

To Learn More Visit: http://www.freefishinglures.net

Article Source: http://EzineArticles.com/?expert=Dan_Loker 


see my previous post :
Freshwater Fishing Lures

Monday, October 4, 2010

Freshwater Fishing Lures

Freshwater fishing lures range from big to small and are great for any type of fish. They can be used in any type of water at anytime of the day. When I use freshwater fishing lures I try to use the ones with most attraction to the fish. I would pick one with the right size first, then maybe a colored one but that depends on the quality of the water. If the water looks green you most likely would want to use a dark and green freshwater fishing lure and also one with a bit of jiggle and noise to it so it attracts the fish.


If you're looking at blue water it's most likely going to be deep and just rocks and pebbles at the bottom of it. The type of fishing lures you would want to use is colorful, outstanding, light colored lure but not a lure that is too shiny. The reason is because the water is already bright light color and you wouldn't want a lure that is to bright to look at.

Minnow-rap, shad rap, and even a fat rap would be great for blue water, because there color makes them perfect to the color of water. There outstanding, from the way the freshwater fishing lures move. The minnow rap and shad rap would be excellent for this type of depth because it would attract any fish. The minnow-rap comes in different shapes, but the shape is not the only factor. The design features create unique performance characteristics. Like the shine. The minnow-rap shines in clear water, cold water and are really tough against fish when they bite. The shad-rap is a floating minnow for its sudden wiggle and fish catching ability. But that's not the only characteristic, the shine gives it the action and attraction for the fish, it matches perch which is what walleye love to bite on.

I look forward to your comments and please check out some more interesting information at.
http://www.freshwater-fishinglures.com
http://freshwater-fishinglures.com/?p=13

Article Source: http://EzineArticles.com/?expert=Tanios_Daher 


see my  previous post :
Fish Lures - Facts You Should Know Before Fishing

Sunday, October 3, 2010

Fish Lures - Facts You Should Know Before Fishing

It goes without saying that you need fish lures to bag the catch of the day. You can't just choose any kind of lure though. There are some important considerations and facts that you need to look into to make the right choices.

If you're new to the pastime, the first thing you need to learn is that there are different tools for different water and catch types. This simply means that your lure choice would depend on whether you are on fresh or saltwater. Moreover, there are also different appropriate choices for common targets like bass, trout, minnow, salmon and pike. The right choice will determine your chances of success.


There is no need to look far for the best fishing lures. You can easily find them in any store that specializes in such merchandise. Naturally, store sold branded items are very reliable because manufacturers have their good name and authority at stake. You can't slip with a good brand. The downside to heading for the store is that you should expect to pay a good amount of cash. This is especially if you are a true sportsman and would like to try luring different catches in various conditions.

It might not be financially practical to get brand new sets. Moreover, expensive items aren't the best to use in potentially harsh conditions. Because you paid good money for them, you'd probably hesitate casting them into rocky areas.

The good news is that you can make fishing lures. You might think that this is beyond your ability but there are now many instructional guides available that offer step by step instructions that are easy to understand and follow. All you need to do is to go online and find the right e-book.

You don't have to worry about where to get materials. Most homemade lure types can be made out of items that you can easily find at home. Even if you don't have them, you can just go to a hardware store and get them. Some of the tools you will need include hammers, saws, electric drill, hand drill, pliers, snips and soldering iron. Making fish lures has never been easier. The best part is that e-books and the materials needed don't cost a fortune.

Since the main tools for getting a catch tend to differ, you would do well to make sure your guide provides information on all the important types. For bass and salmon for example you would be able to make good use of popping plugs, propeller plugs and collar plugs. Spin bugs such as the silent and popping types can also serve the same purpose. For those more interested in saltwater targets, you should go for guides with instructions on making spoons and jigs.

The truth is that the best fishing lures are those that you make yourself. You'd love them because they don't cost a lot and they are easy to make. Because they are so cheap, you don't have to suffer minor heart pains when you lose them in the deep.

Make The Best Homemade Fishing Lures.
Learn How At http://www.freefishinglures.net.

Article Source: http://EzineArticles.com/?expert=Dan_Loker


see my previous post :
The Most Popular Fishing Lure

Saturday, October 2, 2010

The Most Popular Fishing Lure

In the fishing world there are thousands and thousands of fishing lure choices available to anglers at any given time, so is it even possible to say that one fishing lure is the most popular lure for fishing? Probably not. There is the best selling fishing lure, the lure that your grandfather swore by and said was the best lure that could be used for fishing, and the fishing lure that you caught your biggest personal fish on, but the truth is that the most popular lure is one among a few choices that have stood the "test of time", and have been proven to be successful at catching fish in various fishing situations.

In this article I will list e few of the more effective and popular fishing lure choices, all of which are among the most popular fishing lure choices on the market. The bottom line is that the most popular lure or fishing is the one that catches fish consistently. Any of the lures below accomplish this task and catch fish consistently in a variety of fishing situations.

1. Arbogast Hula Popper - The Hula Popper has been around for more than sixty years, and many anglers swear by it's pulsating skirt for attracting hungry predatory fish such as bass. This top water lure is deadly when "popped" over weed beds or submerged timber. This popular lure is one that every angler should have at their disposal.
2. Rapala Fat Rap - This fishing lure is made from balsa wood and manufactured by Rapala, one of the most well respected names in the fishing lure game. When crank bait anglers encounter open water and weary fish, they can reach for their lightweight outfit and tie-on a Fat Rap. The tight swimming action of this balsa lure has been proven to be effective for many species of fish in various fishing situations.
3. KickTail Minnow - This fishing lure mimics the motion of a real fish so realistically eight professionals couldn't tell the difference between it and a live shad when it "swam" toward them on retrieval. This lure is definitely the "newest" lure being outlined in the article, but is nonetheless extremely effective as a lure for fishing (especially where live shad are present in the water you are fishing).
4. Original Rat-L-Trap - Bill Lewis' legendary invention, the Rat-L-Trap, is recognized as the most popular, and consequently, the most imitated lure over the past 35 years. Today's Rat-L-Trap is proven by leading experts to produce sound qualities nearly identical to those of schooling bait fish under attack. These sounds are the "Dinner Bell" for predator fish and is certainly one of the most popular lures available to anglers.

The most popular lure for fishing is probably impossible to determine, but there is little doubt that the answer to this question lies among the preceding choices. If any of these lures aren't a part of your fishing arsenal they should be added sooner, rather than later.

Trevor Kugler is co-founder of JRWfishing.com and an avid angler. He has more than 25 years experience fishing for all types of fish, and 15 years of business and internet experience. He currently raises his five year old daughter in the heart of trout fishing country.

Very Effective Fishing Lures

Article Source: http://EzineArticles.com/?expert=Trevor_Kugler 


see my previous post :
Make Your Own Fishing Lures - A Time Honored Craft For the Serious Angler

Friday, October 1, 2010

Make Your Own Fishing Lures - A Time Honored Craft For the Serious Angler

I love crafting, especially woodworking. I am equally, if not more, passionate about fishing. One truly rewarding experience is the combination of two things I love, which is creating homemade wooden fishing plugs. You, too, can enhance your fishing experience: make your own fishing lures!
The incredible experience of creating your own handmade wooden fishing lures is hard to beat. If you love fishing, you'll find that landing a catch using a lure you made yourself is an event that is hard to beat.
The possibilities are endless when it comes to creating your own wooden fishing lures.

1. Homemade Lure Wood Choices

You have the option of using a softwood or a hardwood. Softwoods, such as balsa and basswood, create a buoyant lure so that it will float. The softwoods are easier to work with, and the resulting lure offers more action in the water. Other popular lure softwoods are red and white cedar.

Hardwoods are usually harder to work with as far as shaping and cutting, but they have many of their own benefits as well. Hardwoods can be used to make suspending lures. Typical lure hardwoods include oak, birch, walnut, and maple.

2. Handmade Fishing Lure Equipment and Supplies

You'll find that the hobby of making your own fishing lures requires little in the way of supplies and equipment. The largest investment is your time, and if you enjoy crafting, it is time well spent. Here's a general supply list:

* Scroll saw, drill, carving or whittling knife
* Wood
* Lure Hardware (screw eyes, split rings, treble hooks, acrylic if creating a lip)
* Sandpaper, masking tape
* Permanent marker and paper
* Wood sealer, paint, marine varnish, and wood filler
* Miscellaneous supplies such as pliers, paint brushes, etc.

3. Endless Lure Possibilities

You can vary every lure you make so that no two are alike. Keep in mind, though, if you create only one copy of a truly hot and successful lure and it gets lost, you may find yourself wishing you had a digital photo image of that specific lure or some specific notes on how you made it.

You can vary the lure by wood choice. You can choose whether to place a weight inside the plug body. You can change the action of the lure based on its shape and the hardware used. You can change up the lure appearance by the detailing and paint used.

4. Budget Minded Fishing Tackle

You can easily "assembly line" your lure making, making several at one time, which is very practical since all the materials are out and available.

If you make your own fishing lures, you can have several on hand in case one gets lost, or dare I say it, hung in the trees. Nothing is worse for an angler than losing his last lure just when the fish start biting, but buying up several extra "have on hand" commercial lures gets expensive.

5. The Rewards of Lure Testing

If you make your own fishing lures, by all means, you must test them. That is where the big fun and reward comes in.

So hit the hobby room, spend a weekend cranking out several homemade fishing plugs, and get to the lake. Analyze which lures work well, making notes on types of fish caught, time of day, the weather, and so forth.

You'll be an expert lure maker in no time, and oh, the sweet rewards of catching fish using your own lure creations. Happy angling!

Get more info on how to make your own fishing lures. Make them for yourself, as gifts for friends, and you might even consider making homemade lures to sell! Check out more great tips and tricks for anglers and crafters at Handcraft Market.

Article Source: http://EzineArticles.com/?expert=Sam_Bass


see my previous post :
Making Wooden Fishing Lures For Beginners

Thursday, September 30, 2010

Making Wooden Fishing Lures For Beginners

When I was a boy I wanted to try my hand at making wooden fishing lures. I remember how I used to marvel at all the lures in my tackle box and wonder at how to make fishing lures. So without any experience or anyone to help me I tried to make my own homemade fishing tackle. Let's just say my first few attempts didn't quite turn out. That's why I decided to write this article on making wooden fishing lures so that you can avoid making the same mistakes I did when I first tried.
My first attempt at making homemade fishing tackle went like this if I remember correctly. I grabbed on old broken broom from my mom's closet and did my best at hand carving out a very rough looking fishing lure. I didn't know anything about what wood selection, sealing the wood or proper painting techniques I just wanted to make my own homemade fishing tackle. Back then there wasn't anyone to help me, no internet just plain trial and error.

Once I had sanded the wooden lure into shape and used some of my dads eye screw from his tool box and attached a few hooks I took my car modeling testor paints and gave that fishing lure the best minnow paint job that would make any 12 year old boy proud. I remember heading down to the lake and trying her out when I was finished. What a disaster! The fishing lure didn't wobble like the other wooden lures in my tackle box and my paint job lasted all of 5 minutes before it began to peel and curl and hang off my homemade fishing tackle like a wet soggy noodle. I was broken hearted. Wow making wooden fishing lures was a lot harder then I had hoped.

In retrospect how to make fishing lures isn't actually difficult it just takes some proper consideration and technique. The tools needed do not have to be complex and you don't have to spend a lot of money. In fact a lot of fishing lure making jigs can be constructed from old scraps lying around and they will do as good of a job as any fancy spinner wire making jig around.

Here are a couple quick tips on making wooden fishing lures.

1. Proper Wood Selection. While you can craft out a lovely looking crankbait from your mom's or wife's old broom handles it isn't exactly the best choice. Most wooden baits in our tackle box are made from balsa or basswood. However not a lot of people have access to these kinds of woods so easily without either having to travel to an exotic wood store or through special order. So what's a guy to do? Well, take a tip from antique lure collectors. There's a lot of great lures back in the old days that used red or white cedar. These woods make excellent wooden lures and are a lot more accessible for the average hobbyist how wants to learn how to make fishing lures.

2. Seal the Wood Before you Paint.I know that for a lot of wood projects you often seal and varnish the wood when you're done to protect it. This isn't the best option when it comes to painting a professional job on your wooden lure. By sealing the wood with a couple light coats before you paint you make the job of painting a lot easier. Great lure painting comes with practice but you will find it is a lot easier to get even coats if you seal the wood before you paint. Also after sealing make sure to sand the lure one more time before painting. Sometimes sealing the wood raises the grain a bit, even if you can't feel or see it. By sanding after sealing with using fine grade sandpaper you help to lower that grain and make it even. Again making it easier to get a nice even coat of paint.

Making wooden lures isn't a terribly difficult task but it does take some thought and technique to turn out a lure that is going to rival any rapala you have in your tackle box. There's a lot more to learning how to make homemade fishing tackle and it's best to read more about the subject before trying. That way you'll save yourself the same experience that I had when I was a boy trying to make wooden fishing lures.

For information about tackle making and get some great tips visit homemade fishing tackle. There you will find a lot of great information and resources to help you get started in this fun hobby of making fishing lures.

Article Source: http://EzineArticles.com/?expert=Tony_Bolton 


see my previous post :
How to Make Fishing Lures

How to Make Fishing Lures

How to make fishing lures is one of those hobbies that is extremely fun to learn and very satisfying. There's no feeling that can describe catching your first bass or trout on a fishing lure that you made all by yourself. The problem is there isn't a lot of information out there in learning how to make fishing lures. Most people start off in the hobby through a lot of trial and error. I was no exception to this. Back when I was a boy I used to marvel at all the fishing and experience for a 12 year old boy, trying to carve out fishing lures out of your mom's lures in my tackle box and wonder at how fishing lures were made.
My first few early attempts at making fishing tackle didn't quite turn out. In fact the results were down right hilarious. Back then there wasn't hardly any information about how to make fishing lures at all, so everything had to be learned through experience broom sticks and painting them with your car modeling testor paints. I still remember running down to the water with my first fishing lure that I had made. It didn't wobble, I think the paint job only lasted a few minutes before starting to peel and hang off my lure like wet noodles. But it sure was a lot of fun.

Today learning how to make fishing tackle doesn't have to be like back when I was boy. Even though there isn't a ton of information available the art of making fishing lures has come a long way to helping the beginner.

The first step is having a basic knowledge of fishing tackle, design and function and knowing of what lure making supplies you really need. After that the fun can begin as you try your hand at making fishing lures. Here are a couple quick tips to help you out in making wooden fishing lures.

* 1. Most wooden lures in your tackle box are made of a few different types of wood. Balsa and Basswood are the most common woods used to make fishing lures. However you can make some really great fishing lures out of more common wood found in you local home improvement store. Cedar makes some great fishing lures and you can use both red and white cedar. I have had great success using both. They carve and shape fairly easily and due to the woods water resiliency finish up nicely.
* 2. Easy Ready to Go Painting Patterns. Did you know you can use your wife's or mothers used nylons to get some great patterns on your fishing lures without a lot of fuss. By using an airbrush you can take advantage of some of the patterns on used nylons to make some great subtle patterns on the sides of wooden fishing lures just make sure to use an old pair or you just may find yourself in the dog house if you use your wife's best Sunday nylons.
* 3. Always seal your wooden plugs before painting. This was something I didn't even know to do when I was a boy during my early fishing lure making attempts. It may sound like a small tip, but it goes a long way to making some nice fishing lures. Just use some wood sealer from your local home improvement store but here the crucial tip. After doing so sand down the fishing lure once more using very fine sandpaper, or even a brown paper bag. Wood sealers have a tendency to raise to raise the grain in wood, and this would result in an un-even paint job. It doesn't take a lot of time to do, but it helps to create a better looking fishing lure.

There's a lot more that can be shared about how to make fishing lures, and for most the best way to start learning is to jump in and start having some fun. I would suggest however to get the most from your first few tackle making attempts is to learn a little more about this fun hobby.

For more information about how to make fishing lures visit tacklemaking tips. There you will find a lot of great information and useful information on how to get started in this fun hobby.

Article Source: http://EzineArticles.com/?expert=Tony_Bolton 


see my previous post :
Trout Fishing Lures - Tips On Which Ones To Use To Guarantee Success

Monday, September 27, 2010

Trout Fishing Lures - Tips On Which Ones To Use To Guarantee Success

There are countless different kinds of trout fishing lures which you can experiment with as you progress toward becoming a master angler, and which lure you use will depend on the type of trout, where you are fishing and the fishing conditions, and the time of year. Broadly speaking, however, trout fishermen typically use whichever fishing lure they are most comfortable with but also which lure the trout appear to be going after on the day so remember to arrive with a variety of lures and be flexible.


Trout fishing conditions change because of insect hatches and other natural food sources that the trout are most exposed to. Since trout are known as "easily-spooked" fish, you need to replicate the natural environmental factors at any given time found in the habitat you are fishing in. One great tip is to ask at the local bait shops which lures they are finding the most success with.

Let's consider a few of the variety of lures available to you.

Spoons are popular trout fishing lures because they come in all sizes and thickness. Early-season trout might demand thicker spoons because they are in deeper, faster water, while a thinner spoon works better in calmer waters, later in the season. Spoons cast easier than other types of lures, so you can cover more water in a shorter amount of time.

Spinners are popular trout fishing lures to consider as well. They are known to run deep, making them perfect for early season fishing. They are available in a variety of sizes, but a general rule of thumb is to consider a tiny 1/32 ounce lure with 2 pound test in smaller creeks, a 1/16 to 1/8 ounce spinner in mid-sized streams and move up to heavier 8 pound test line and a 1/4 ounce spinner in the deeper and faster waters.

Minnow plugs are popular lures because they resemble a natural food source of the trout. You will need to mimic the size of the local minnows that are found in the stream you are fishing in; generally, however, smaller minnow plugs are the best. That means you should keep the length below 5 inches and it can be best to use minnow plugs that are 2 to 3 inches long in almost any trout stream.

Flies are a category of trout fishing lures that encompasses a large number of styles, colors and sizes. When you are fly-fishing, there are different techniques you need to learn because you are imitating the natural insect hatch, which is their favorite food source. There is a wide variety of flies to choose from and there are many avid fishermen that "tie" their own flies. You can find kits for building your own trout flies at sources that cater to trout fishermen.

As you can see, there are many different choices when it comes to trout fishing lures. The secret is to find the ones that offer the best results for the conditions where you are fishing. Call on the expert advice of experienced anglers and educate yourself to accelerate your results and you will soon find that your results are more reliable and consistent than ever before.

Jerry Worden is a trout fishing expert. To learn secrets on how to become consistently successful in your trout fishing and selection of trout fishing lures and to obtain a Free Trout Fishing Secrets mini-course, visit http://www.troutfishingsecretsthatwork.com/ now.

Article Source: http://EzineArticles.com/?expert=Jerry_Worden 


see my previous post :
How to Make Plastic Fishing Lures

Saturday, September 25, 2010

How to Make Plastic Fishing Lures

How to make plastic fishing lures is one of the easier tasks when it comes to tackle making. It doesn't require a lot of tool, and the items required in order to make them are relatively inexpensive such as liquid plastic. Once these items are acquired you can make soft plastic worms and other plastic lures for pennies a piece.
The most expensive part about how to make plastic fishing lures is obtaining a mold. Molds are used to speed the whole process up and they make a more uniformed plastic worm. You simply pour the melted plastic inside holding the mold at an angle to insure the mold fills from bottom to top that way you do not get any air bubbles inside your plastic worms. Then you let the mold sit to cool so that the plastic sets, then removing the plastic worm carefully place them inside a small container of water to finish cooling and curing. Adding things like glitter etc are ways you can jazz up your own homemade fishing lures.

But what if you don't want to bother with purchasing a plastic worm mold? Can you still make soft plastic lures? How to make plastic fishing lures without a commercial mold is not that difficult to do. Here's how I go about making a mold from common Plaster of Paris. The first step is to simply create the two halves of the mold. You can use anything you like to hold the plaster, aluminum foil, small cardboard boxes, pie plates etc. The trick is to let the 2 halves partially set before actually creating your mold. I like to let my molds set for about 30 minutes to an hour depending on the thickness of the plaster.

The next step in how to make plastic fishing lures is to use a master worm. Now a master worm can be anything really, the easiest is to use a worm from your tackle box or make one from modeling clay, either way works. If you do choose to use a plastic worm from your tackle box make sure as you set the worm into one half of the mold to line up the seam on the worm with the top of the plaster otherwise you'll land up with 2 seams in your new plastic fishing lure. One from the master and one from your newly made mold.

Ok before setting the master worm inside one half of the mold it is important to coat the worm in either some Vaseline or vegetable oil. The purpose here is so that the worm doesn't stick to plaster once it is fully set. Now carefully set the plastic worm into the mold halfway. Again paying attention to any seams that may exist on your plastic worm.

Next we need to make registration pins in the mold so that it will line up the way we want when it comes time to pour in our melted plastic. The easiest way here is to use some finishing nails I like to use about 3 and set them into the semi set mold. Then put the other half of the mold on top, clamp it together and let it set overnight to insure the plaster fully sets.

All is not done yet, there are still a couple steps yet to do in how to make plastic fishing lures. Now after we have removed the master worm and the plaster is fully set you need to cut a sprue channel so that you have somewhere to pour in the melted plastic. Finally we need to seal the mold. Plaster is porous and even if it's fully set you will have all kinds of little leaks inside the mold if you do not take the precaution to seal your mold. Any kind of epoxy or mod podge will work. Don't get carried away just a light coat will do. Now our mold is finished.

As you can see how to make plastic fishing lures isn't that difficult and there are creative ways we can get around the more expensive parts to making plastic fishing worms by making our own molds. There are a few other pointer to make mention and you should be able to pour out your plastic worms without any trouble, and that is before pouring the melted plastic into the mold, coat the insides lightly with some vegetable oil or Vaseline just so its easier to remove the finished product.

For information about tackle making you can find a lot of resources over at homemade fishing lures. There you can find a lot of useful information and instruction on how you can make your own plastic fishing lures.

Article Source: http://EzineArticles.com/?expert=Tony_Bolton 


see my previous post :
Some Great Tips To Help You Catch More Fish While River Fishing